Best Method for Importing Data via Feed
Import your feed data
Importing a feed is the first step to syndicating and distributing data. You may also want to add additional feeds to add further information to your product data.
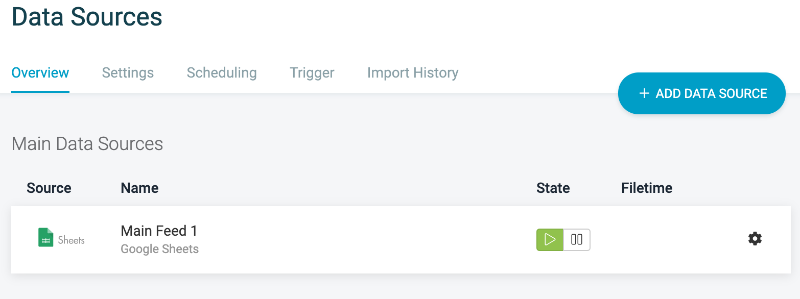
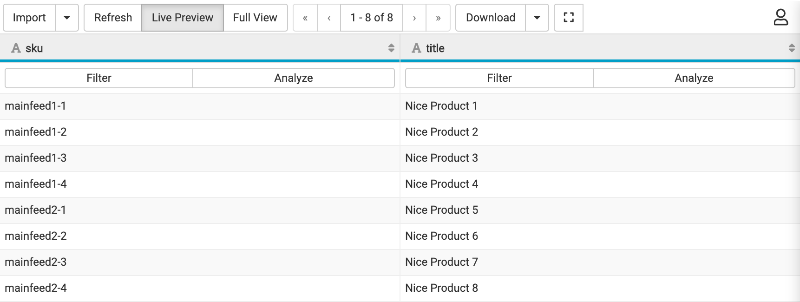
Main Feeds : Every site requires at least one main feed. Adding additional main feeds adds more products and extends the data vertically.
Example: One Main Feed

Example: Two Main Feeds

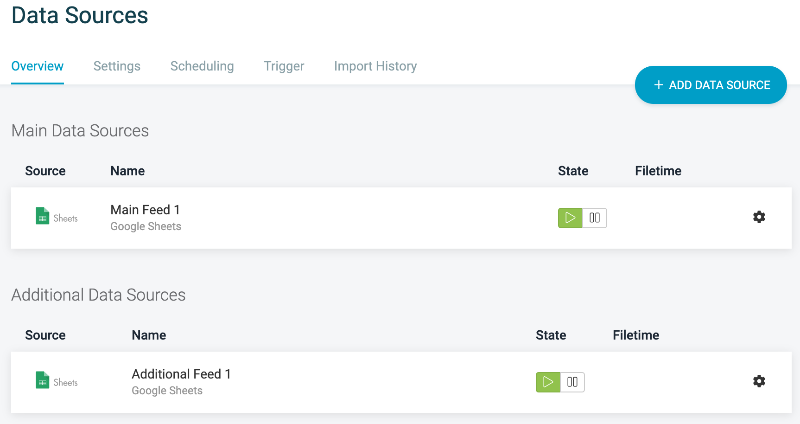
Additional Data Sources : contain further information on the products to enhance and update the main feed. Additional feeds extend your data horizontally. You can set a feed as an additional feed by selecting the Additional Data Feed button in Content Mode.

From the drop-down menu, select the column from your main feed that contains your product identifier, for example, ID or SKU.
Enter the name of the matching column in your additional feed. The column name is case-sensitive. Columns in the additional feed that do not appear in the main data feed generate new columns in your product data. Note if columns in the additional feed also exist in the main feed; the values in the additional feed overwrite values for all items with a matching identifier.

Import data from a shop system
Introduction
It is possible to import the product data directly from shop systems.
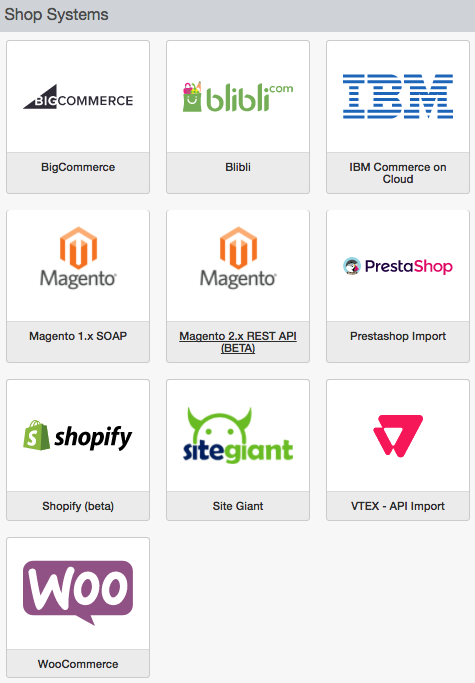
In Data Sevices, APIs are available for the following shop systems:
-
Bigcommerce
-
Magento
-
PrestaShop
-
Shopify
-
Woocommerce
-
VTEX
To connect to these shop systems through an API, you must have:
-
The API endpoint's URL.
-
An API key/username.
-
An API password/client_secret.
Please note: Usually, API credentials are different from your login credentials for the shop system.
Import your data from Magento systems
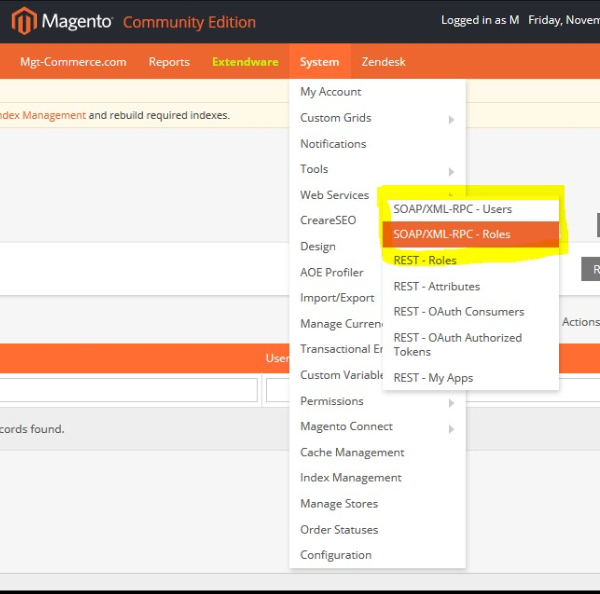
For Magento, a connection is possible through SOAP, XML, RPC, and API.
As a basic test, check if your browser can reach the WSDL page via a URL in this format: https://mymagentoshop247.com/api/soap/?wsdl.
If the setup is correct, you should see this information:
In Data Services, add the following information:
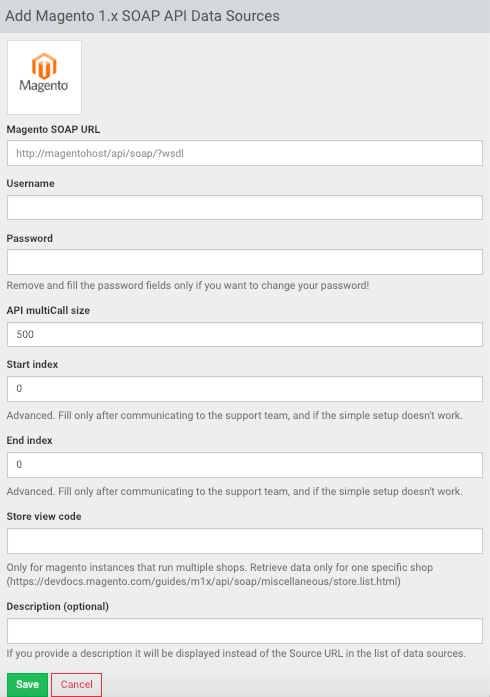
Magento SOAP URL: Enter the Magento URL you have set up to access Magento via SOAP.
Username/Password: Enter the Username and Password for your Magento SOAP account.
API multiCall size: Enter how many calls the Productsup platform should make. The default is 500.
Start index/ End index: Specify the first and last values of an ID range for the API to call within.
Store view code: Enter a store view code to download products from a particular store.
If you use Magento 2x, create a user with token-based authentication.
After creating a valid user, you can input the username and password into the data source interface on the Productsup platform. Next, enter the store URL.
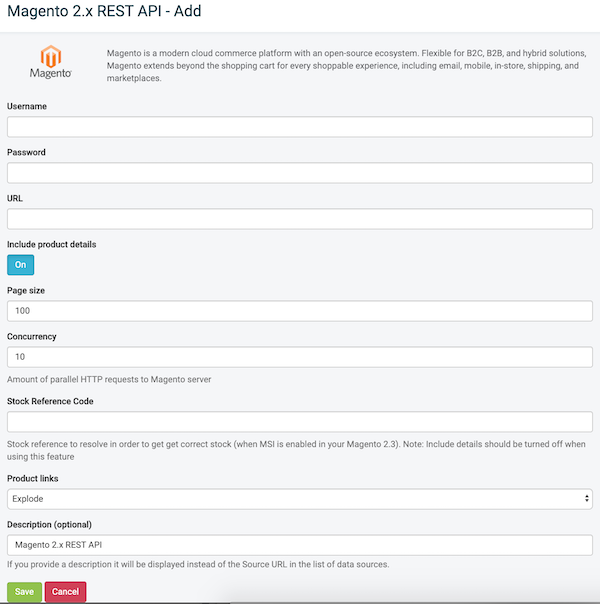
The page size determines how many products the Productsup platform should extract with each call to the API. This number is set to 100 by default. You can adjust this depending on the capacity of your hosting server. If the load on the hosting server is too high, reduce the page size accordingly.
You can also adjust the number of concurrent requests by changing the value under concurrency. Note increasing concurrency puts a significant load on your server. Check your server's capacity beforehand to ensure it can handle such an increase.
With Magento Version 2.3, you may add a stock reference code to pull the correct stock information. In this case, switch off Include product details.
The standard way to handle product link information is to explode it, that is, split links into separate columns. However, exploding links can lead to too many columns resulting in an import error. If you receive such errors, set product link information to implode. This action merges all links into a JSON body or discards them.
If you use Magento 2.X using OAuth, you must first authorize the Productsup platform to access your account.
In Data Sources, select Magento 2.x (OAuth) and select your authentication from the dropdown menu.
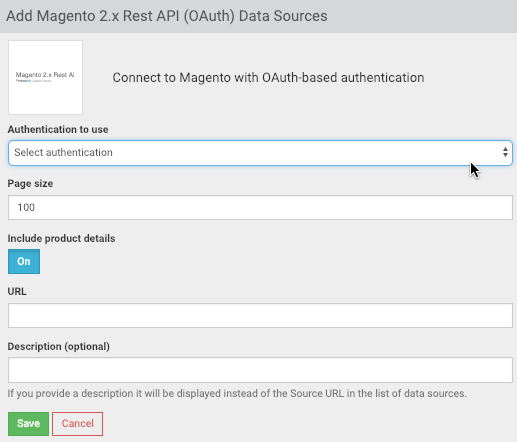
The page size determines how many products the Productsup platform extracts with each API call. The number of calls is set to 100 by default. You can adjust this depending on the capacity of your hosting server.
PrestaShop
Before importing your data from PrestaShop you need to generate an API key in PrestaShop .
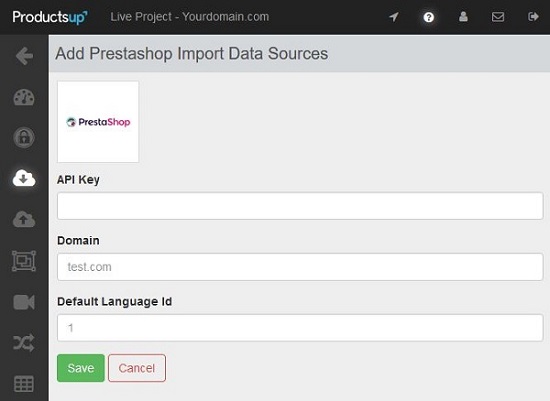
To import your PrestaShop data, enter an API Key , the Domain of your PrestaShop, and the Default Language Id . Select Save and run an import.
Woocommerce
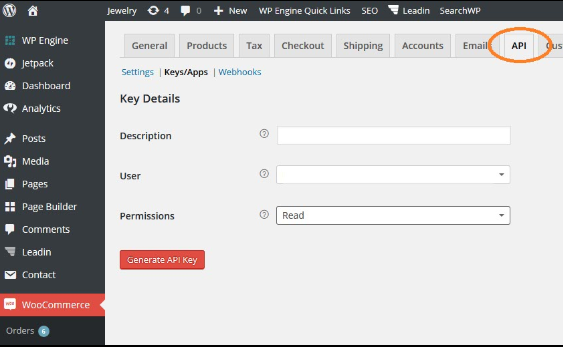
In Woocommerce set up API credentials as follows:
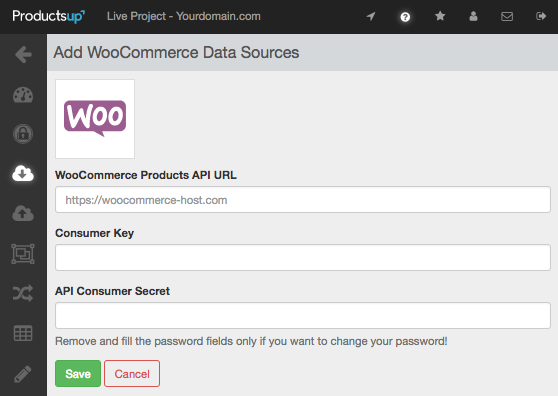
In Data Sources, select Add Data Source and run an import.
Troubleshooting
Try adjusting the URL and authorization credentials based on the notifications you receive from Productsup.
It is possible to test REST APIs credentials in a standard browser depending on the shop system and the API version. Most API clients can make both REST and SOAP test requests.
The following are test URLs for the major shop system you can try in a standard browser:
-
Bigcommerce:
https://apiusername:api_key@www.exampledomain.com/api/v2/products -
Shopify:
https://api_key:api_password@example-domain.myshopify.com/admin/products.json -
Woocommerce:
https://ck_myconsumerkey:cs_myconsumersecret@example-domain.com/wc-api/v3/products
If the credentials do not work in the browser or API client. Try the following:
1. Add or remove www and other parts of the URL.
2. Add or remove slashes in or at the end of the URL.
3. Try HTTPS or HTTP.
4. Set up new API credentials.
5. Check the shop system forum for common errors.
VTEX
You can import your product catalog from a VTEX shop system in Data Sources.

Enter the following information:
Product Endpoint URL: Enter the call for desired products in this input field.
Category Endpoint URL: Enter the call for desired categories in this field. Import only downloads products from selected categories.
Whitelist Columns: Enter the names of the attributes you want to import as columns in this field.
Description: Optionally enter a description for the data source.
The VTEX - API Import with Authentication
Using the basic VTEX API only picks up "public" information. However, you can extract more information by establishing a secure connection to your VTEX environment. To make a secure connection, you must authorize the Productsup platform to access your VTEX account. In Data Sources, configure your import settings as follows:

Account Name : Enter your VTEX Store Account name.
Environment : You can select the environment to use. Options include vtexcommercestable and vtexcommmercebeta.
App Key : This is the username/key for the Authentication process.
App Token : The password associated with the App Key.
Whitelist Columns (optional) : There is a limit on the number of attributes imported from VTEX to the attribute names listed in this text area. If you leave this field blank, the Productsup platform imports every attribute from VTEX.
IBM Commerce on Cloud
To import attributes from your IBM Commerce on Cloud shop system, you need to enter the store and login credentials provided by IBM.
After that, select which of the following action you want to perform in Data Services:
-
Merge - Download parent products and their variants. Variants inherit the attributes from the parent product.
-
Product - Download parent products and variants. Variants do not inherit the attributes from the parent product and can be empty.
-
Category - Download all variant categories per SKU.
Set a Timeout if needed. The default setting is 180. Timeout defines how often the Productsup platform checks if the file is ready. For instance, 180 means the Productsup platform checks your IBM Commerce account every 3 minutes.

Import data with the Website Crawler
Introduction
The Website Crawler is a service that imports additional product data from the website. You could consider using a Website Crawler in cases where product data is on the website but not available in the data feed.
The Website Crawler converts a website into a feed. This process is different from Data Crawler process that requires a feed. To add a Website Crawler, do the following:
Step 1: Add a data source
Select Add Data Source


Step 2: Configure settings
The Website Crawler automatically pulls data from your domain but requires some configuration. You must set up the Website Crawler to crawl your domain sustainably.
Also, make sure your web administrators know about any upcoming crawls so that the Website Crawler is not blocked.
Domain: Enter your domain (with www. if needed) without HTTP://
Start URLs: You can enter more than one URL for the Website Crawler to crawl.
Crawl Subdomains: Only activate this option if you have a subdomain, for instance: http://shop.yourdomain.com .
Optional - Crawl Websites via Proxy Server: You can configure your own servers to crawl the website as follows:
Select the Use Proxy Server button.
In the pop-up menu, enter the server host, username, password, and the port.


Link Contains: Enter a URL snippet to limit the number of pages the Website Crawler attempts to crawl. For instance, you could limit it to crawling product sites only.
Filters (include): Only links containing the filter's keywords are processed.
Filters (exclude): Links containing excluded keywords are not processed.
Please note: The Productsup platform uses exact matches for Link Contains, Filters (include) & Filters (exclude) which means that if you use the value /p/ the Website Crawaler seeks exactly /p/ .
You can use an asterisk as a wildcard character:
- If the value is */p/ it should end with /p/:http://www.test.com/p/.
If the value is /p/* it should start with /p/:/p/123456.
If the value is */p/* it means that /p/ can be anywhere in the string:http://www.test.com/p/123
This last syntax gives you the flexibility to create structures such as */cat/*/p/* that matches :http://www.test.com/cat/123/p/456
Question marks can function as a regular character or as a wildcard for a known number of random characters.
For example:*/???/*/p/* matches: http://www.test.com/cat/123/p/456
User-Agent: Credentials for the user agent.

Concurrent Crawlers: Set the number of active crawlers. You can start with a few and increase their number so long as the performance of your website is performance unaffected.
Note: The more crawlers implement, the faster the crawl, but you should balance this with your website's performance.
Retry on Error: Set how many times the crawler should initiate a crawl if the page is unreachable.
Crawler timeout per page (seconds): Set how long the crawler should wait for answers to its requests before aborting the operation.
Max count of pages to crawl: Set a limit on how many pages to crawl. Start with a limit of around 100, and gradually increase the maximum amount of pages to crawl. If your limit is too high, it could slow down processing for your site in Productsup, preventing you from importing and exporting while the Productsup platform waits for the crawler to stop.
Important: Check the Permissions checkbox to authorize Productsup to crawl your website.

Save changes.
Import data from an RSS feed
To import data from an RSS feed, select Add Data Source in Data Sources .
Search for RSS Feed and set it as the data source.

Enter the RSS feed URL and select Save .
Note that if your products exist on multiple pages, you must enter values into the Page Variable and First Page/Last Page Value fields.
For example, if the RSS URL is http://www.yournewsfeed.com/rss/xml?page=1, the page value is page . Alternatively, for http://www.letsfeedit.com/rss/xml?paginated=1: has a paginated page value.
Import data from an existing Google spreadsheet
You can use Google spreadsheets as a Main Feed or an Additional Feed .
In Data Sources , select "Feed/URL" as the data source. To add an existing Google spreadsheet, you must adjust the URL Google provides you.
In this example, the {key} in brackets is a variable and is usually a combination of numbers and letters in the spreadsheet's URL:
https://docs.google.com/spreadsheets/d/{key}/export?format=csv The ?format=csv parameter makes the Google spreadsheet available as a CSV file. Note that only the first tab in the spreadsheet generates a CSV.
Import specific sheets
If your spreadsheet contains more than one sheet, and you want to import one of them aside from the first tab, you can do this by adding the GID . {gid}.
You can find the GID at the end of the spreadsheet's URL:
https://docs.google.com/spreadsheets/d/{key}/export?format=csv&gid={gid}
Import a range from a spreadsheet
If you want to import a specific area from your Google spreadsheet, you must add an additional parameter. For example: range=A3:C15 You can combine this with the GID parameter if you want to import a specific area of a particular sheet.
https://docs.google.com/spreadsheets/d/{key}/export?format=csv&gid={gid}&range={range} In the end, your URL should have this format:
https://docs.google.com/spreadsheets/d/1-WthisbAX9wdhTj5gjNjR9rBw10WAvfdfdfdy1o2TiZ20/edit#gid=666000148&range=A3:C15
Important: Set accessibility of the spreadsheet to accessible for anyone with the link. Otherwise, the Productsup platform cannot import the spreadsheet.
How to find your Google spreadsheet key :
The spreadsheet key is a long sequence of characters in the "key=" attribute of the URL. Alternatively, it might be present between the slashes in the URL.
Import data from a shopping platform
If no import feed is available, it is possible to import the product catalog directly from specific shopping platforms and marketplaces.

Import data from AliExpress
To use AliExpress as your data source:
-
Enter your API Key.
-
Choose the relevant categories for your product data.
-
Select Save and import the feed by selecting Import in the Data Source tab.
Please note: The categories list does not include Home & Garden, Electronic Components & Supplies, and Phones & Telecommunications.

Import from Amazon Marketplace
Use this data source to import your data from the Amazon Marketplace using the Amazon Product Advertising API.
Before starting, you need to register as a Product Advertising API developer with Amazon Associates. There you can create an API Access Key and an Access Secret Key.
Access the API via the Productsup platform
Go to the Data Sources tab, click Add Data Source and select the Amazon Product Advertising API as a source in the dropdown.

Mandatory Fields
To access the Amazon Product Advertising API via the Productsup platform, you need the following:
-
Your AWS API Key
-
Your AWS API Secret Key
-
Your AWS Associate Tag (Associate ID)
-
The country you registered in
-
The last mandatory field is the category field where you enter the Amazon Search Index.
Refining your product import
If you do not want to download all products, you can refine your request with the following fields:
-
Browse Node: Categories divided into sub-categories.
-
Keywords: Enter keywords to narrow your request to items associated with these keywords.
-
Brands: Enter brand names to narrow your request to items from certain brands.
-
Availability: Filter for available items.
-
Condition: Filter by condition.
-
Minimum Price/Maximum Price: Define a price range for the products imported
Import from the eBay API
You can import your product catalog via the eBay API in I Data Sources . This feature is beneficial when you directly connect your shop system and the eBay Marketplace. It also enables you to advertise your products on other marketing channels without creating a master feed.

You can find the appId and globalId eBay account. The Productsup Platform requires these to access the API and download the catalog.
Add the categoryId of the products you want to import.
Keep in mind: You can only download one category per data source. If you want to download multiple categories, you can add more in Data Sources .
Use additional import sources
Microsoft Azure Blob Storage
You can import data from Azure Blod Storage as follows:
-
Click on Add Data Source in the Data Sources menu.
-
Search for Microsoft Azure Blob Storage and select it.
-
Enter the URL for your blob storage in Container .
-
Enter the domain in Account Name .
-
Enter the Access Key in Access Key .
-
Click on Save .

Import a local file
You can also import local files. Either drag the file to the white area or browse for the file. Select Upload .
By default, the Productsup platform detects the file form. But you can optionally enter the file format. Select Save all settings .
After you select Save all settings , the Productsup platform imports all data.
Please keep in mind:
-
You can only choose one data source at a time to upload.
-
The Productsup platform automatically creates an FTP server if you import using this option. The file goes to the FTP server. Deleting the File Import Data Source also removes the FTP account.

After the first upload, you have the same setup options as the Feed/URL Data Source.
If you want to replace the Local File , you can either delete it, re-add it, or use the Edit button in the Data Sources setup:

Create a new Google spreadsheet data source
You can create new Google spreadsheets in Data Sources directly.
If you want to create a spreadsheet without signing into a Google account, you can create a Google spreadsheet with Productsup Google authentication . With this, you can obtain a public link to edit the spreadsheet if you leave the Authentication dropdown menu blank.
If you want to create a spreadsheet with your Google account, first authorize the Productsup platform to access your Google account in Authentication. If you have not done this already, check Add OAuth authentication to external systems to find out how to grant the Productsup platform access to your Google account.
After granting access, you can select your Google account as an option in the authentication dropdown menu. You can then access this data source in your Google drive.

Important : If you subsequently delete this data source from the Productsup platform, it automatically moves to the trash in your Google drive. You can only restore this file from your Google Account.
Import data from a PIMPMS system
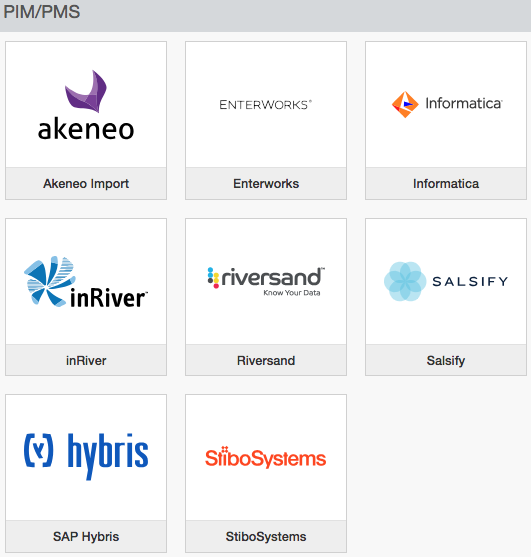
You can import data from a PIM/PMS using the PIM/PMS option in Data Sources .
Import SAP Hybris
Enter the Source URL and your username and password to import SAP Hybris data into the Productsup platform. Note, this import only works if you have SAP Hybris installed on your system.

Import data from Akeneo
1. Import data with the Akeneo Cloud API Import
Prerequisite: To use this data source, you need Akeneo PIM version 4.0 and more recent, or Serenity version (SAAS version)
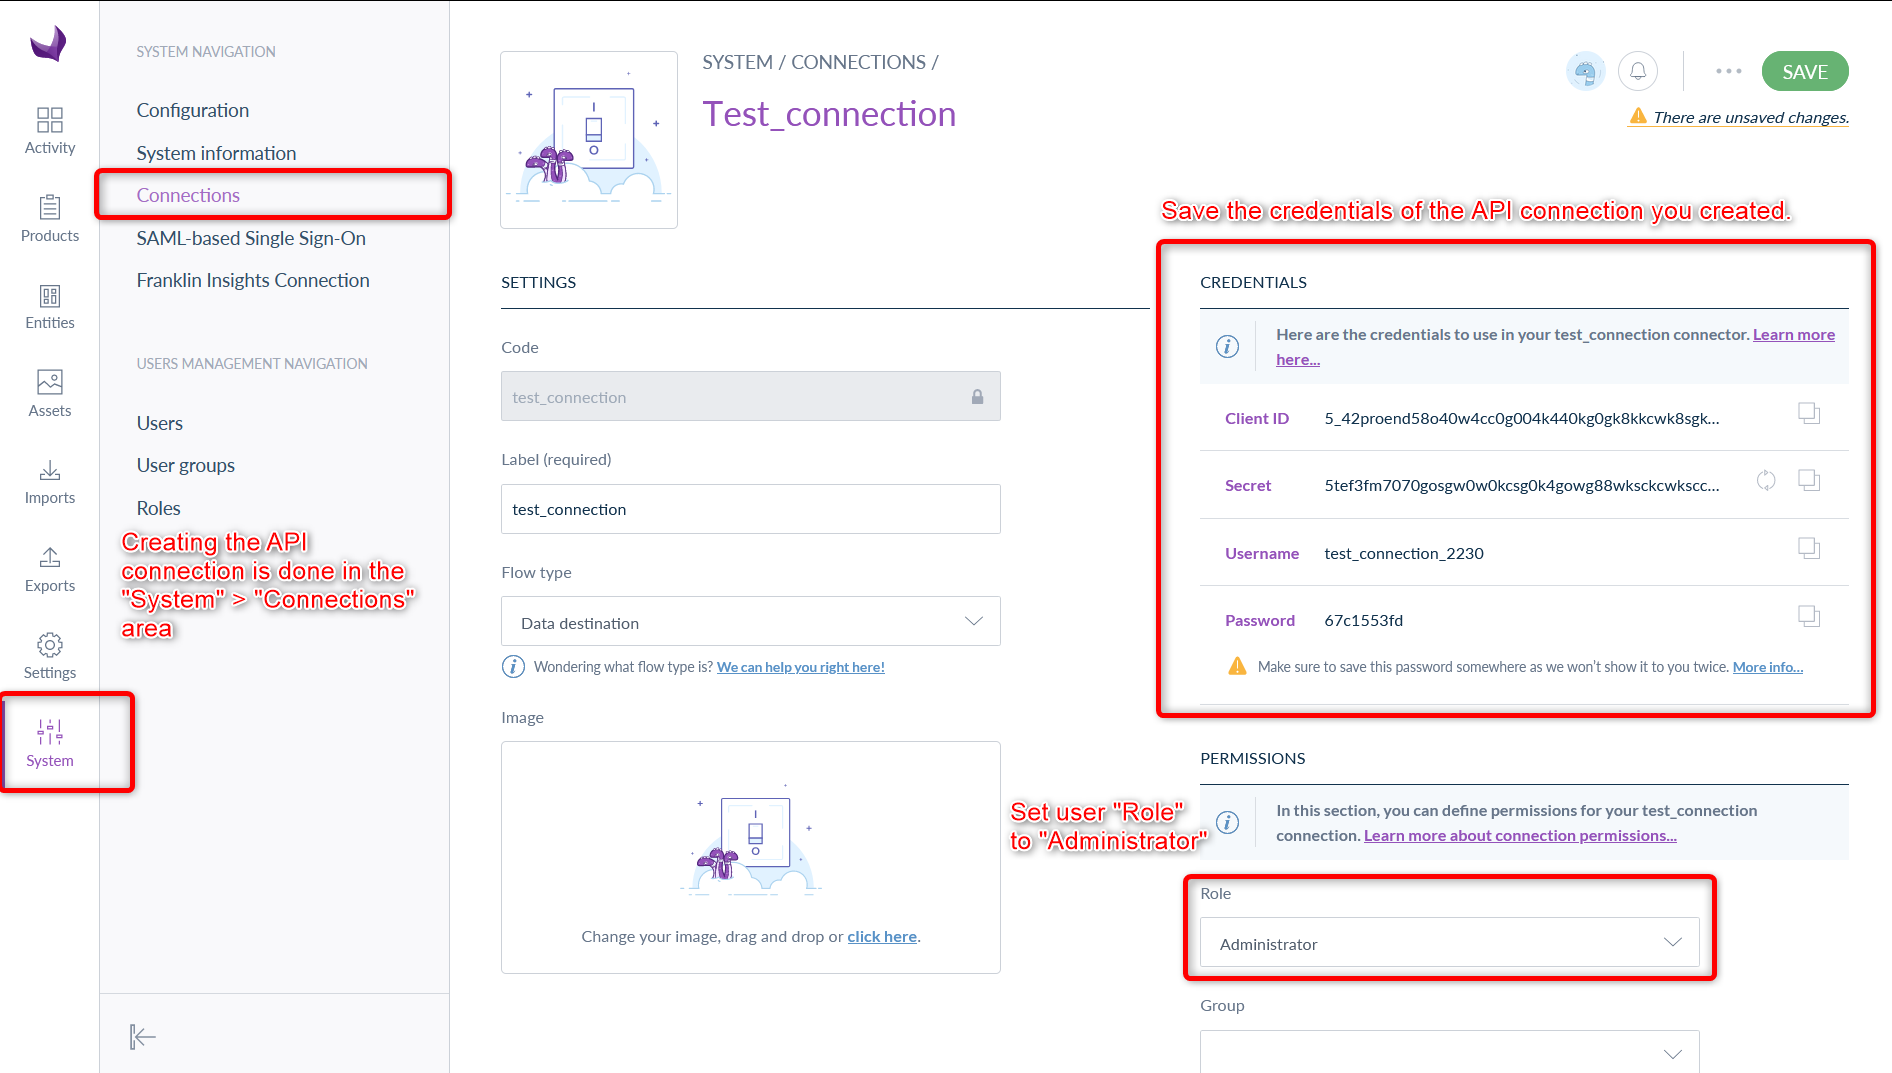
1.1 In Akeneo: Configure the API connection
-
In your Akeneo Instance, go to System.
-
Go to Connections.
-
Select Create at the top right.
-
Enter the destination Label and set Flow Type as the Data Destination.
-
Make a copy of the following four credentials: Client ID, Secret, Username, and Password. Some of this information displays only once, so make a copy immediately .
-
In both the Role and Group drop-downs, set proper user permissions.
1.2 Add the Akeneo Cloud API Import in Productsup
In your Productsup account:
1. Go to Data Sources.
2. Select + Add data source.
3. Search for Akeneo and add Akeneo Cloud API Import.
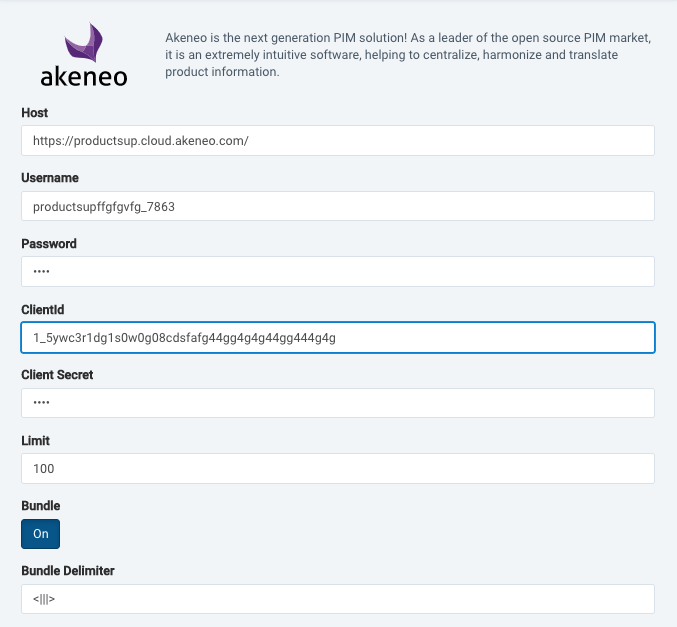
4. Enter the Hostname - the URL that hosts your Akeneo instance.
5. Enter the four credentials you received from the Akeneo Connection: Client ID, Secret, Username, and Password.
6. Save these settings, and start an import by selecting Import.
The Productsup platform imports all products. The platform also indicates which Entity Groups and Assets are available in the logs. By default, the Productsup platform does not import Entities or Assets.
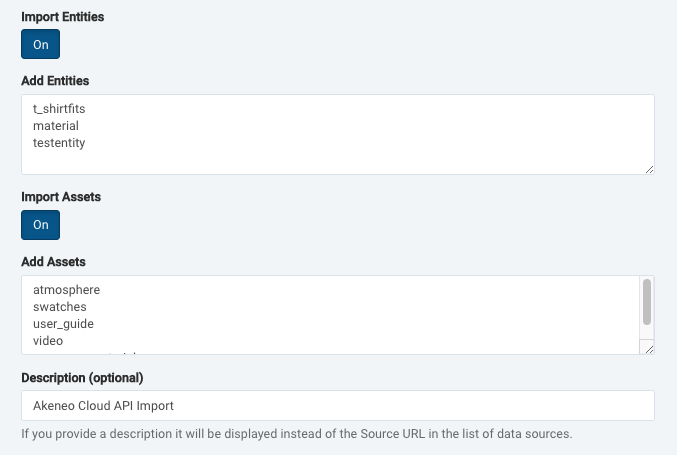
1.3 Optional: import Entities and Assets
If you wish to add Entities or Assets, you must 1. Switch the button "Import Entities" or "Import Assets" to "ON" 2. In the field below, type in the name of the Entity or Asset you wish to import TIP : You can see which Entities or Assets exist and their names in the Productsup logs during the first import. You can open the Logs panel at any time in Probellsup by clicking on the "bell" icon at the top right.
2. Importing from Akeneo using a CSV flat file
Prerequisite: You can only use this data source if you are Akeneo PaaS/Flexibility or Enterprise Edition user.
2.1 Set up feed creation in Akeneo
-
In your Akeneo account, go to the exports section by selecting this icon:
Figure 1. Akeneo Exports

-
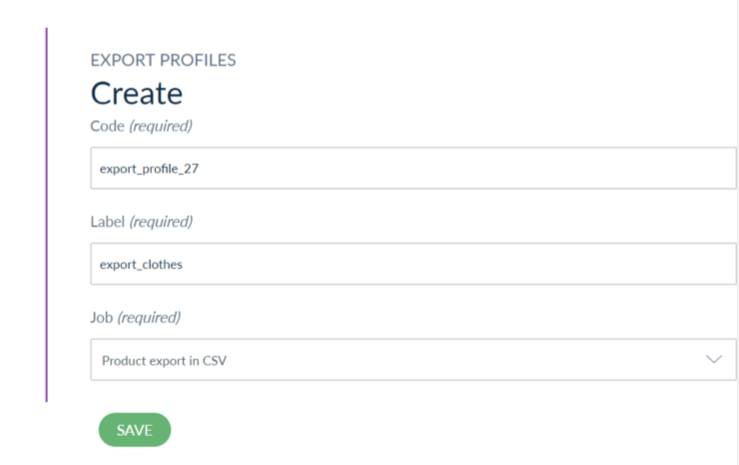
Click on the "Create Export Profile" button in the top right corner.
Figure 2. Export Profile

-
Enter the Code and Label and select "Product Export in CSV" as a job.
-
Go to the Global settings tab and define the File path, Decimal separator, Date format, and Number of lines per file for your feed. If you do not want to export all products, you can define this in the Content menu.
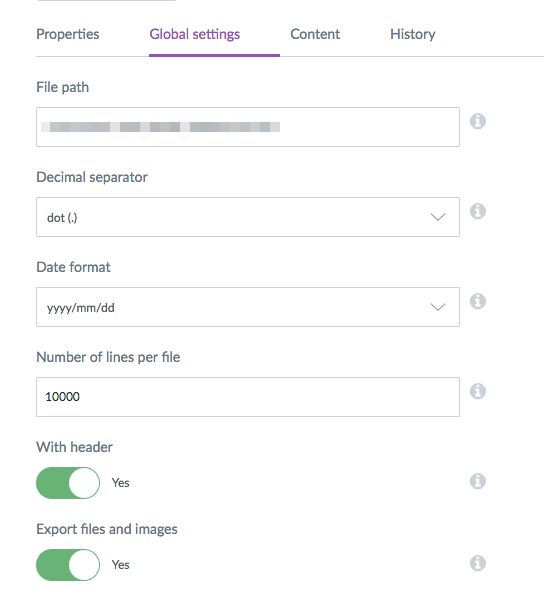
-
The file saves on your Akeneo server. To guarantee that we can always import the latest version of your product data, you need to make sure it automatically updates and is available for download. Usually, the best solution is to add a script that pushes every new feed to an FTP server. Once the feed is available to download, you can enter the Source URL and the access credentials in your Akeneo Data Source in Productsup:
Figure 3. Akeneo
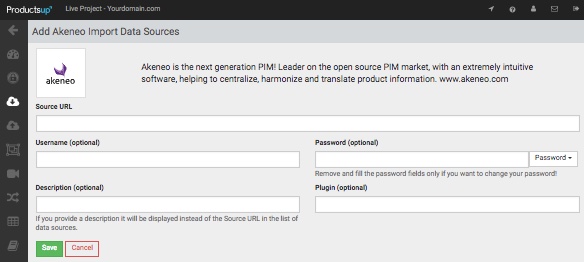
Setup Akeneo Advanced File Import
After generating a feed from Akeneo, you can set up Akeneo Advanced File Import in Productsup.
Enter the URL of the host into the Host field and your Username and Password. Set the filename of the product file and the delimiter for the file. This is all the information required for a basic setup. If the file is not in the source folder of the host, a URI is required.
Additionally, you can add the following files:
- Category
- Variant
- Attribute
- Attribute Options
- Family
- Family Variant

For every filename you add, also set a delimiter. You must add URIs if the locations of the files on the server differ from each other.
Finally, select the locales you want to import.
The import automatically merges the files and creates the necessary variations.
Import data from SAP Product Content Hub (PCH)
SAP Product Content Hub enables customers to create a 360° view of their product data for use in omnichannel commerce. You can onboard product data from multiple source systems. After importing this data into the Productsup platform, you can syndicate it through various sales channels.
Select Add Data Source in the Data Sources menu and search for SAP Product Content. Set it as a data source type.

Enter the host of your SAP PCH and your Authentication token. Select check credentials to validate your token.
Figure 1. sappchui2

You can now select your Catalogue Versions , the Type Classes , and the Languages you want to import from your SAP system.
Import data from PimCore
With PimCore, you can manage, aggregate, and distribute any digital product data. You can format data for multiple channels and deliver user-centric personalized customer experiences.
Prepare data in your PimCore account for export
To import data from a PimCore account into the Productsup platform, you first need to prepare your data for export from your PimCore account.
In PimCore, do the following to prepare your data for export:
Click on the Settings button on the left-hand menu and select Datahub Config.
Creating one config per category is better than batching several categories into one config if you have multiple categories and category-specific attributes. If multiple categories are present in one config, this could lead to the Productsup platform generating an excessive number of attributes, potentially throttling your import. Note that the Productsup platform cannot manage more than 2000 attributes.
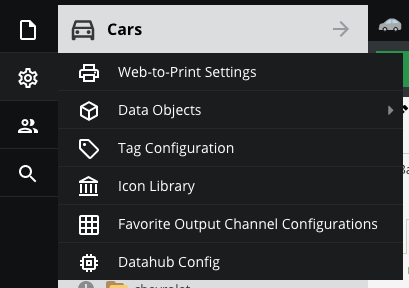
Add a Datahub Config, define the general settings and the schema.
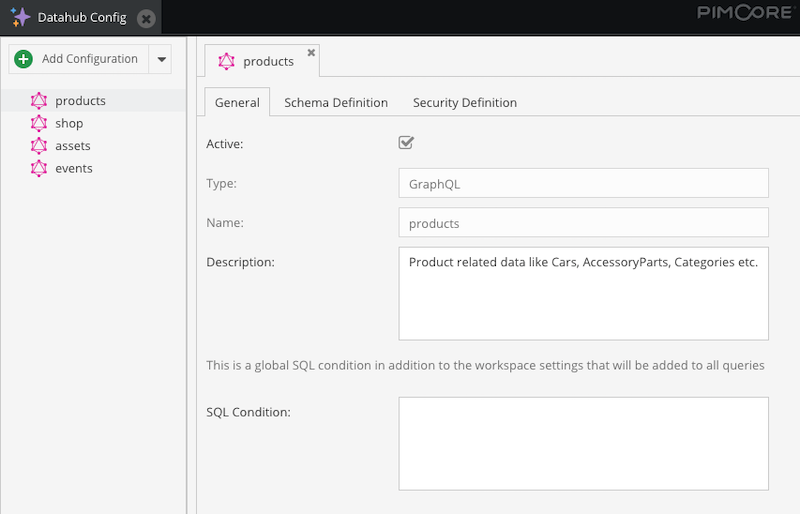
In the Security Definition tab, you can choose which documents, assets, and workspaces are available for export.
Set an object for an endpoint Productsup address. This example uses Product Data.
The tab also has a field for an API key. The Productsup platform requires an API key to the PimCore datahub.
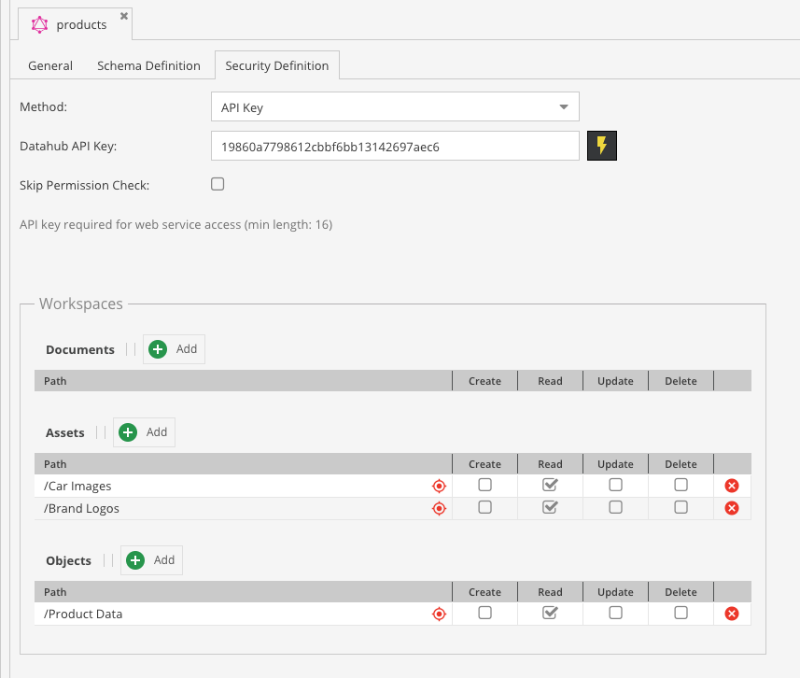
Prepare your Productsup Account to accept PimCore data.
After preparing your PimCore account, you are ready to set up your Productsup account to receive the data. You can add your URL, endpoint, and API Key as a data source in Data Sources.
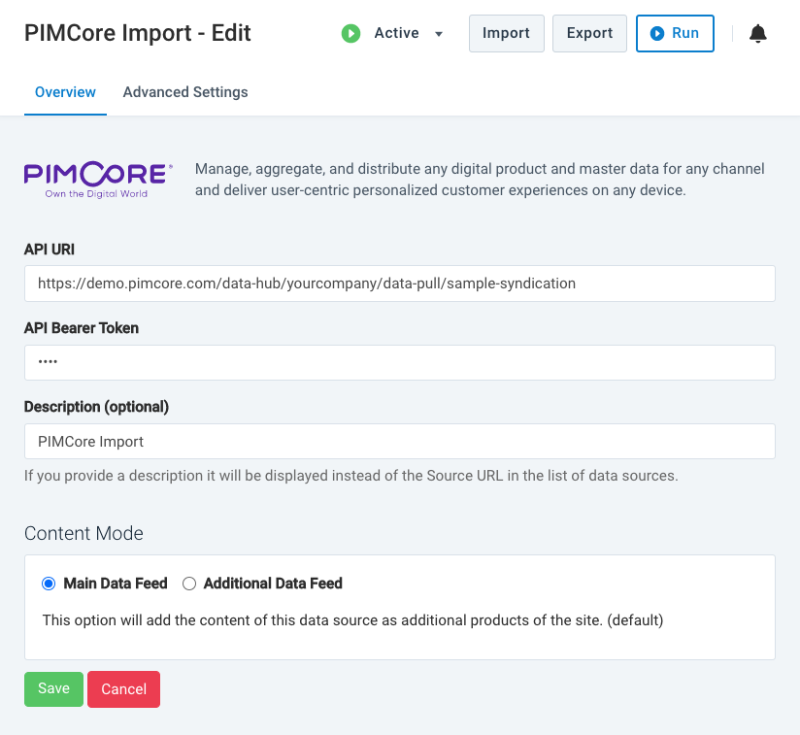
Import data through a Basic API request with JSON Response
To import from a paginated URL with JSON response, you can use our Basic API Request with JSON Response Import.
For instance, for the URL: "www.myonlineshop.com/export.json?page=1". The Productsup platform sends a request to every page to import all data.
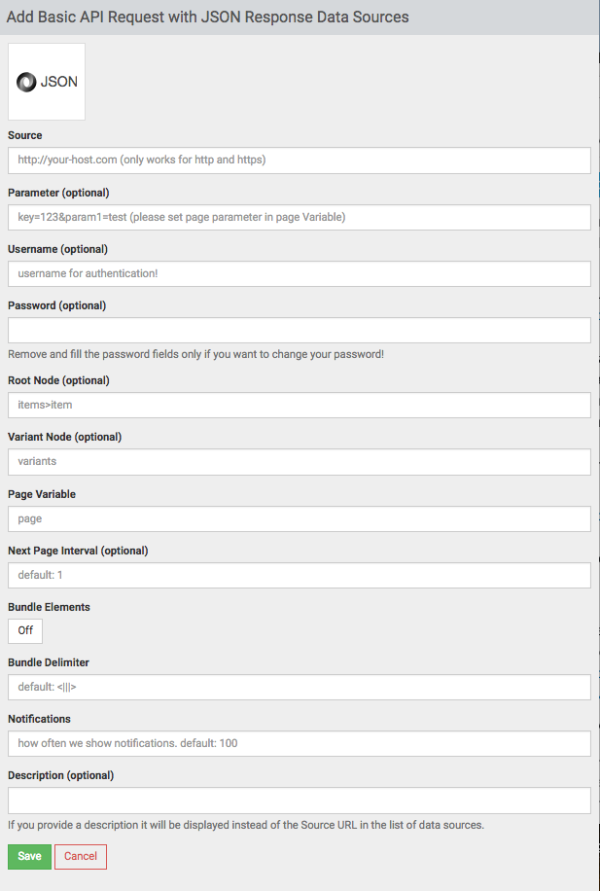
Source: Enter the Source URL. This text includes everything before the question mark in the URL.
Parameter: If the URL contains any parameters in addition to the page parameter, add them here.
Username & Password: Add a username and password if authentication is necessary.
Root Node & Variant Node: You can set the Root and Variant nodes if necessary.
Page Variable: Set the page variable, for example: "page."
Next Page Interval: Set the page interval if it is not "page=1, page=2,...".
Bundle Elements: Activate if you want to bundle elements from repeating nodes.
Bundle Delimiter: Set a delimiter to separate bundled elements.
Notifications: Set a notification interval, for instance, every 10 or 100 products.
Import data from Amazon S3
To import a data source from Amazon S3:
-
Go to Data Sources
-
Select ADD DATA SOURCE and choose Amazon S3 . Confirm by selecting Continue .
-
Enter your API Key and API Secret for Amazon AWS.
-
Enter the bucket name in Bucket and the bucket file name in Filename .
-
Choose your S3 region in Region .
-
Add a Description (optional) .
-
Select Save at the top of the page in the Data Sources tab.
-
Select Import to import the data source manually.

For information on how to set up an automatic import, check Import dynamic URLs.
Import data from MySQL databases
Introduction
You can pull feed data directly from a database in the Productsup platform.
Prepare your data for export
1. Supported database types
Productsup provides connectors for the following database types: - ODBC connector to connect to every database supporting Open Database Connectivity - MySQL connector to connect to any MySQL database - PostgreSQL connector to connect to any PostgreSQL database - Microsoft SQL Server connector to connect to any MS SQL database.
2. Using SQL queries
With SQL (Structured Query Language), users can access multiple data records with a single command. For example, with a select request:
Table 1 "product_data"
| id | product_id | title | type |
|---|---|---|---|
| 1 | 222 | book | direct |
| 2 | 333 | table | dropship |
| 3 | 444 | lamp | dropship |
Table 2 "product_pricing"
| id | product_id | price |
|---|---|---|
| 1 | 222 | 9.99 |
| 2 | 333 | 69.99 |
| 3 | 444 | 49.99 |
Example: Execute the following requests:
select product_data.product_id, product_data.title, product_pricing.price from product_data join product_pricing on product_data.product_id = product_pricing.product_id where product_data.type = 'dropship'
It results in the following output:
| product_id | title | price |
|---|---|---|
| 333 | table | 69.99 |
| 444 | lamp | 49.99 |
Elements of the query
-
select - the select command followed by a list of attribute names defines which attributes to include in the result.
-
from - defines the source table(s) for the data.
-
join - use this command when the data source is more than one table.
-
on - lets users define which attributes to connect in the tables.
-
where - specifies the conditions required for a result to appear.
Optimizing the query
You can make queries more concise by using aliases for long table names. You must add these aliases to the "from" part of the query:
select pd.product_id, pd.title, pp.price from product_data pd join product_pricing pp on pd.product_id = pp.product_id where pd.type = 'dropship'
Setting up SQL Data Sources
ODBC Database Import
The Productsup platform can connect to any SQL database with ODBC drivers installed. For PostgreSQL the Productsup platform support "PostgreSQL UNICODE" or "PostgreSQL ANSI" ODBC Drivers. For MS SQL, the Productsup platform supports "ODBC Driver 17 for SQL Server".
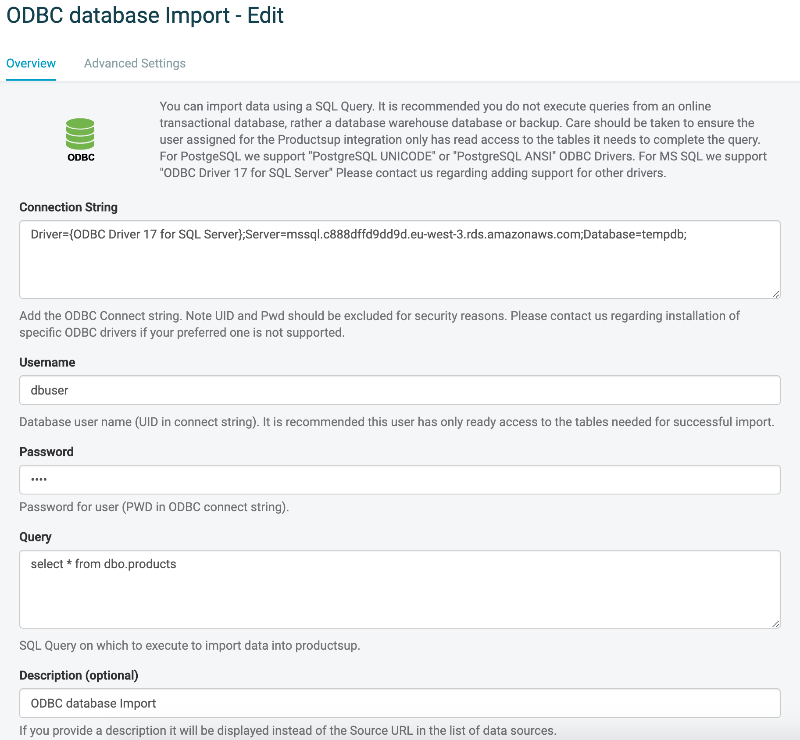
Connection String: Your database provider can generate a connection string. It should have the format: Driver={ODBC Driver 17 for SQL Server};Server=mssql.123testing.com;Database=tempdb;.
Username and Password: Your database administrator can also provide these credentials.
- Query: Add a query as described above.
Description: Add a description for your database.
Import MySQL data
The Productsup platform can connect to any MySQL database.
- Hostname: The hostname of your database.
- Port: The port number assigned to your database.
- Username and Password: Your credentials to access the database.
- Database: Name of your database.
- Query: A query in format described
- Charset: Set your database character set, if known.
- Description: Add a description for your database.
Import PostgreSQL data
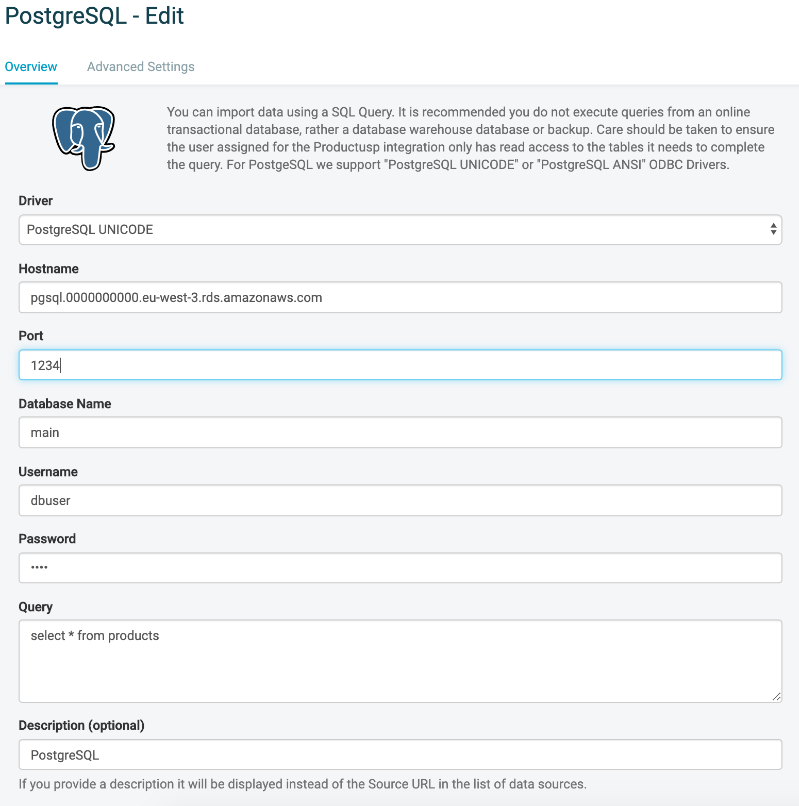
The Productsup platform can connect to any PostgreSQL database.
-
Driver: Select the driver of your PostgreSQL database, either "PostgreSQL UNICODE" or "PostgreSQL ANSI."
-
Hostname: The hostname of your database.
-
Port: The port number assigned to your database.
-
Database Name: Name of your database.
-
Username and Password: Your credentials to access the database.
-
Query: A query in the appropriate format.
-
Description: Add a description for the database.
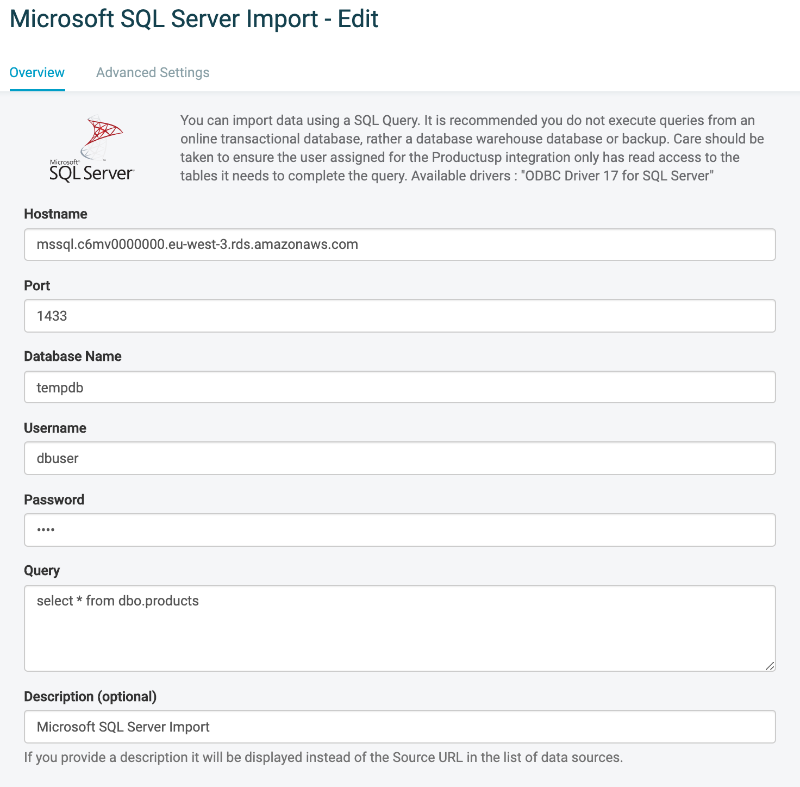
The Productsup platform can connect to any Microsoft SQL Server database.
-
Hostname: The hostname of your database.
-
Port: The port number assigned to the database.
-
Database Name: The name of your database.
-
Username and Password: Your credentials to access the database.
-
Query: A query in the appropriate format.
-
Description: Add a description for your database.
Import data with a basic SOAP API
You can set up a basic SOAP API as a data source as follows:
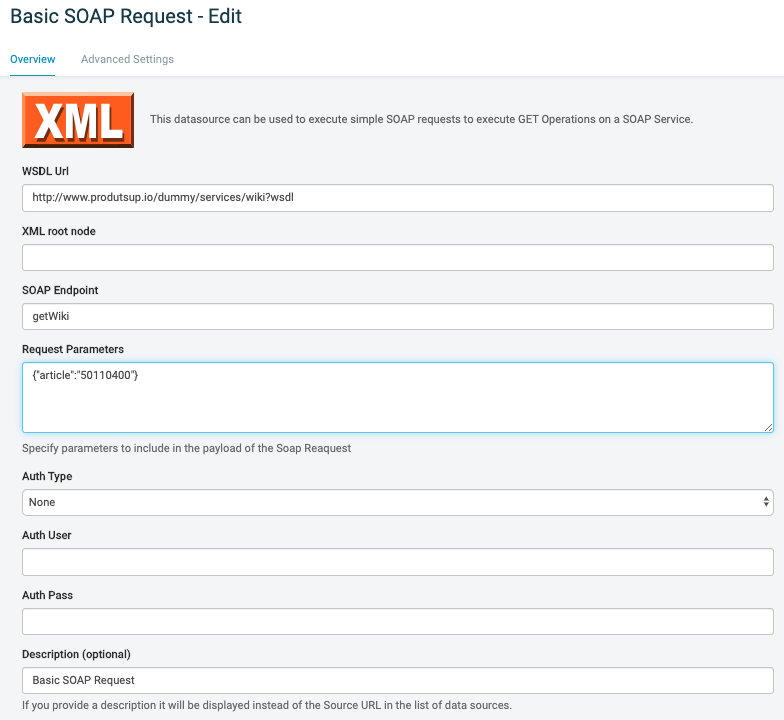
Enter these details:
-
WSDL URL
-
The root node of the Response XML
-
An Endpoint
-
Request parameters
-
Authentication (if required)
Select Save , and the Productsup Platform pulls data from this source on the next manual or scheduled import.
Import data from the Productsup API
The Productsup API offers a dynamic method to import product data.
Add the Productsup API as a data source
Go to Data Sources and filter for Productsup Platform API . Select the Add button.
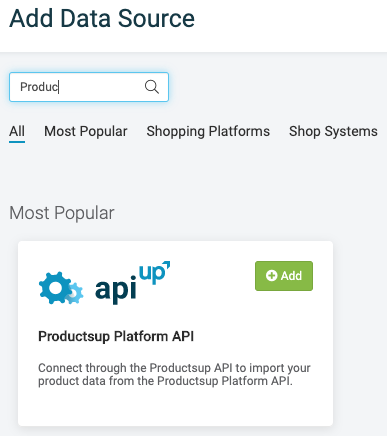
Set up the Productsup API as a data source
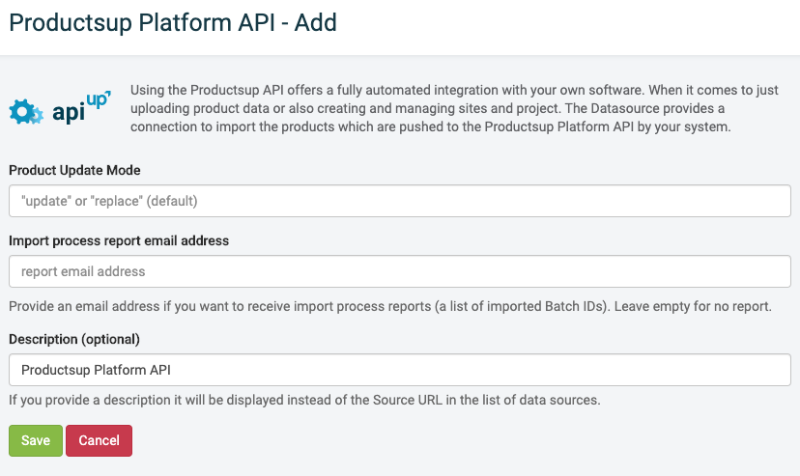
For the Productsup platform to accept the Productsup API as a data source, you must configure the following:
- Product Update Mode: You can set this to either "update" or "replace." If left empty, "replace" is the default. If set to replace, your updates should contain complete information. If set to update, you only need to include the attributes you want to update.
Import process report email address: The email address you enter in this field receives notifications for each import. The email contains a log of the imported batch IDs.
Description: Change if desired.
Import product data from Amazon MWS
Note, this is a different procedure from importing orders from Amazon MWS. If you need help with this, check this document.
If your products already exist on Seller Central, you can import them into the Productsup platform using Amazon MWS as a data source.
Follow these steps to import your products:
-
Go to Authentication from your site's main menu. Select ADD AUTHENTICATION .
-
In Type , select Amazon Authentication (BETA version by Amazon ). You can customize the authentication description in Name . Now, select Next .
-
In Region , select the region for Productsup to manage your inventory.
-
The Productsup platform directs you to Amazon for authentication. Enter your credentials to connect your Productsup exports to Amazon.
-
Authenticate our Developer ID to submit report requests on their behalf. Contact your Account Manager to obtain this authentication.
-
Import the feed, and your products should appear in Data View .
Import data from Google Cloud Storage
Google Cloud Storage Data Source allows users to generate a CSV file from their Google Cloud Storage.

-
Service Account Key: Enter a Service Account Key in JSON format.
-
Bucket: Enter the name of the target bucket in Google Cloud Storage.
-
Object: Enter the name of the target object file.
Note: Currently, Data Source only generates CSV files.
If you merge your main data feed with additional data information via Google Cloud Storage, the import process and merging can take a great deal of time if there is a large data set. To speed this process up, you can set up a Site-Tag that contains the information found as an object in the bucket in the site settings. This setting enables the site to look only for relevant information in the Google Cloud Storage file.
Example: You want your site "US_tablet-case" to import only the tablet cases from your Google cloud file.
-
Tag your site with product_type: tablet-case in the site settings.
-
In the Google Storage field Object , enter the object name in the bucket. In this case, tablet-case-product_info.csv . The site now only imports and merges the relevant information.
If you want to set up multiple sites with a changing set on product_types and product information for each site, you can automate this as the data source. You can also enable support for Twig and Site-Tag variables by default. The site tags can be set up automatically via the Productsup Platform API. The twig automatically pulls in the correct data based on the site-tag from Google Cloud Storage with the API enabled.
Import data from Square POS
Introduction
It is easy to export all your Square POS data to the Productsup platform.
Set up your Square POS account
Log into your Square account and go to Square Applications.
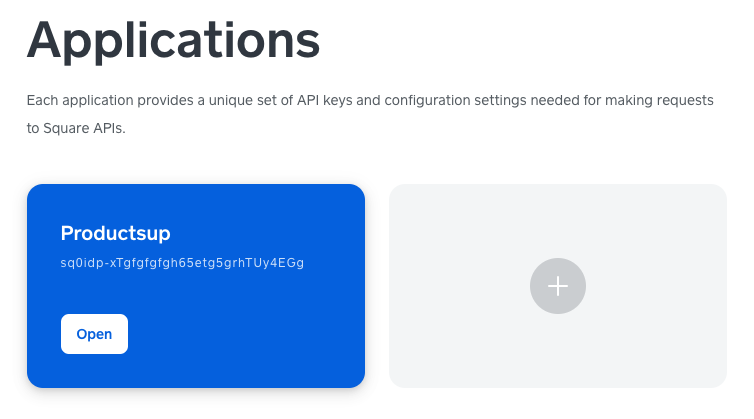
Click on the + icon to add a new application.
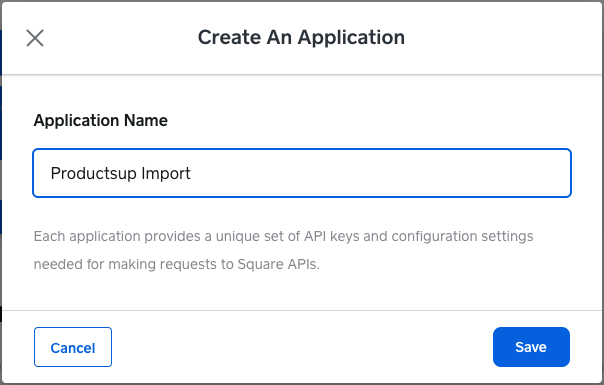
Choose a name and select save.
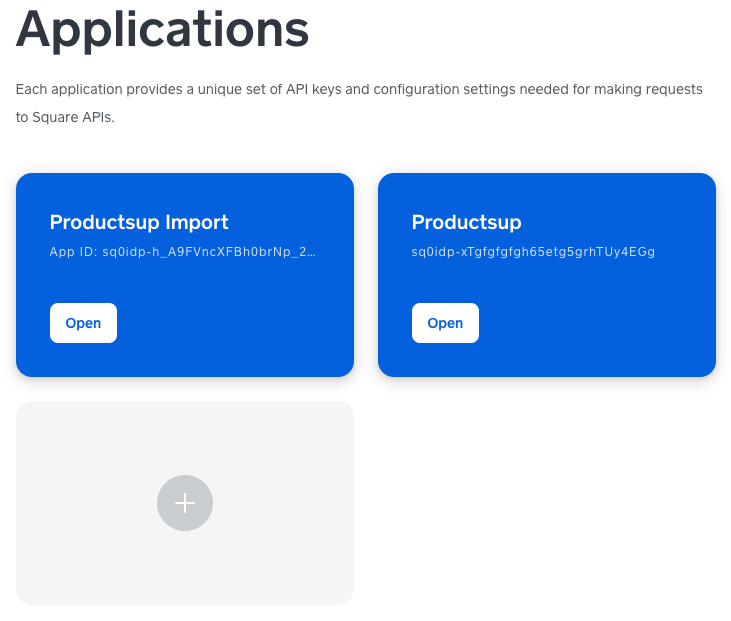
Productsup is now a valid application.
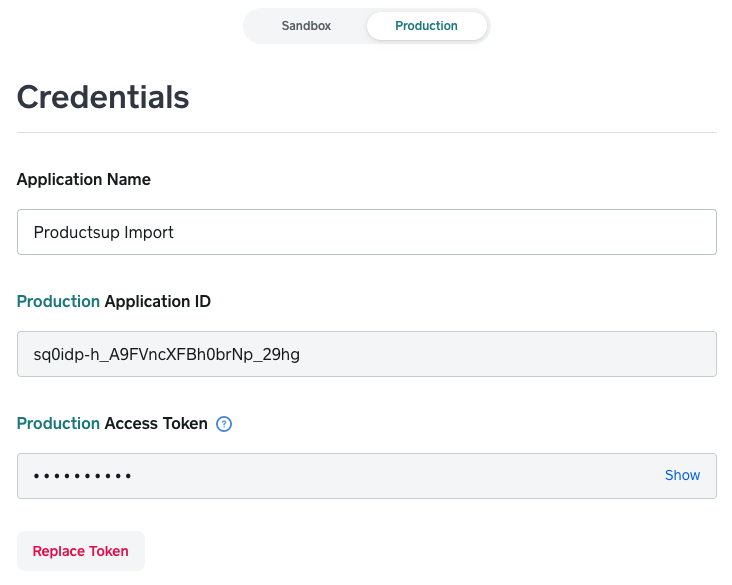
Select Open and go to the Production tab. Select Show and copy the token.
Prepare Data Sources to accept Square POS data
Go to Data Sources and filter for Square.
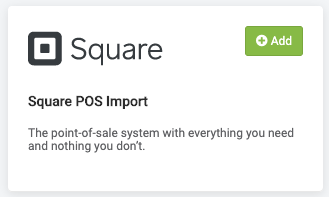
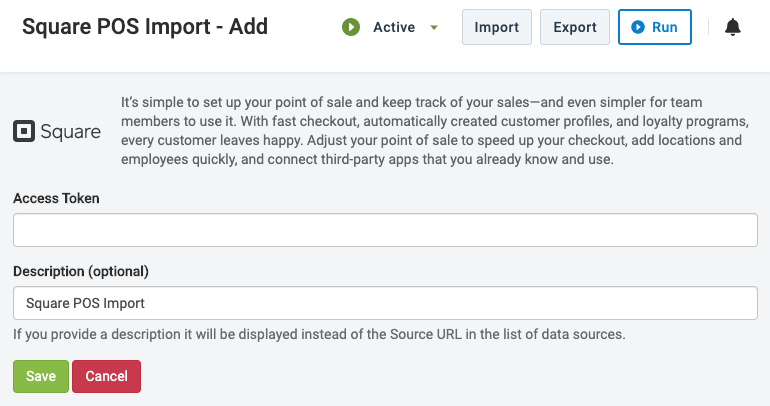
Select the Add button. You can rename the data source or leave the default title.
Import data from iZettle POS
To import product data from iZettle:
Select Add Data Source in the Data Sources menu.
Search for iZettle and select it as a data source type.
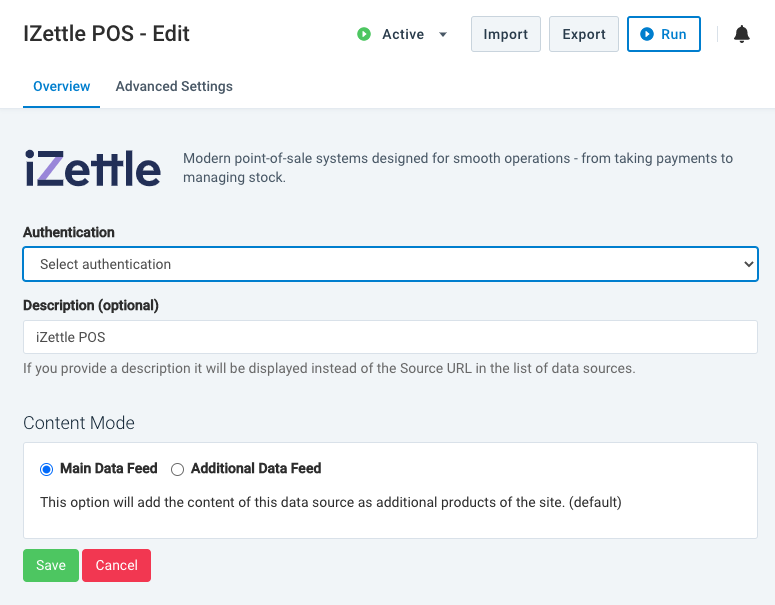
Add your authentication credentials for iZettle and add a description if desired.
Select Save.
Import your Google Delivery Zones data
You may need to import Google Shopping Delivery Zones data if you use Google Regional Inventory: Delivery Zones Export.
If the delivery zones are sent to the Google Merchant Center by more than one source, download all delivery zones from the Merchant Center before importing the delivery zones.
Add the Google Deliver Zones data source
Go to Data Sources and select Add Data Source. Filter for Google Shopping Delivery Zones and select Add. You can add an alternative name for the source. Select Next.

Select the appropriate authentication from the dropdown, or create one if necessary.
Add Merchant ID and Account ID. Select save.

Source: https://help.productsup.com/en/29239-29254-import-your-feed-data.html
0 Response to "Best Method for Importing Data via Feed"
Post a Comment